
Hardening a Hetzner VPS: SSH keys, a cloud firewall, and four traps
A port scan of my own server came back with PostgreSQL and the Coolify dashboard open to the internet. Closing them took an afternoon; the SSH key that was supposed to be the easy part took considerably longer, and cost me a lesson about a single hyphen.
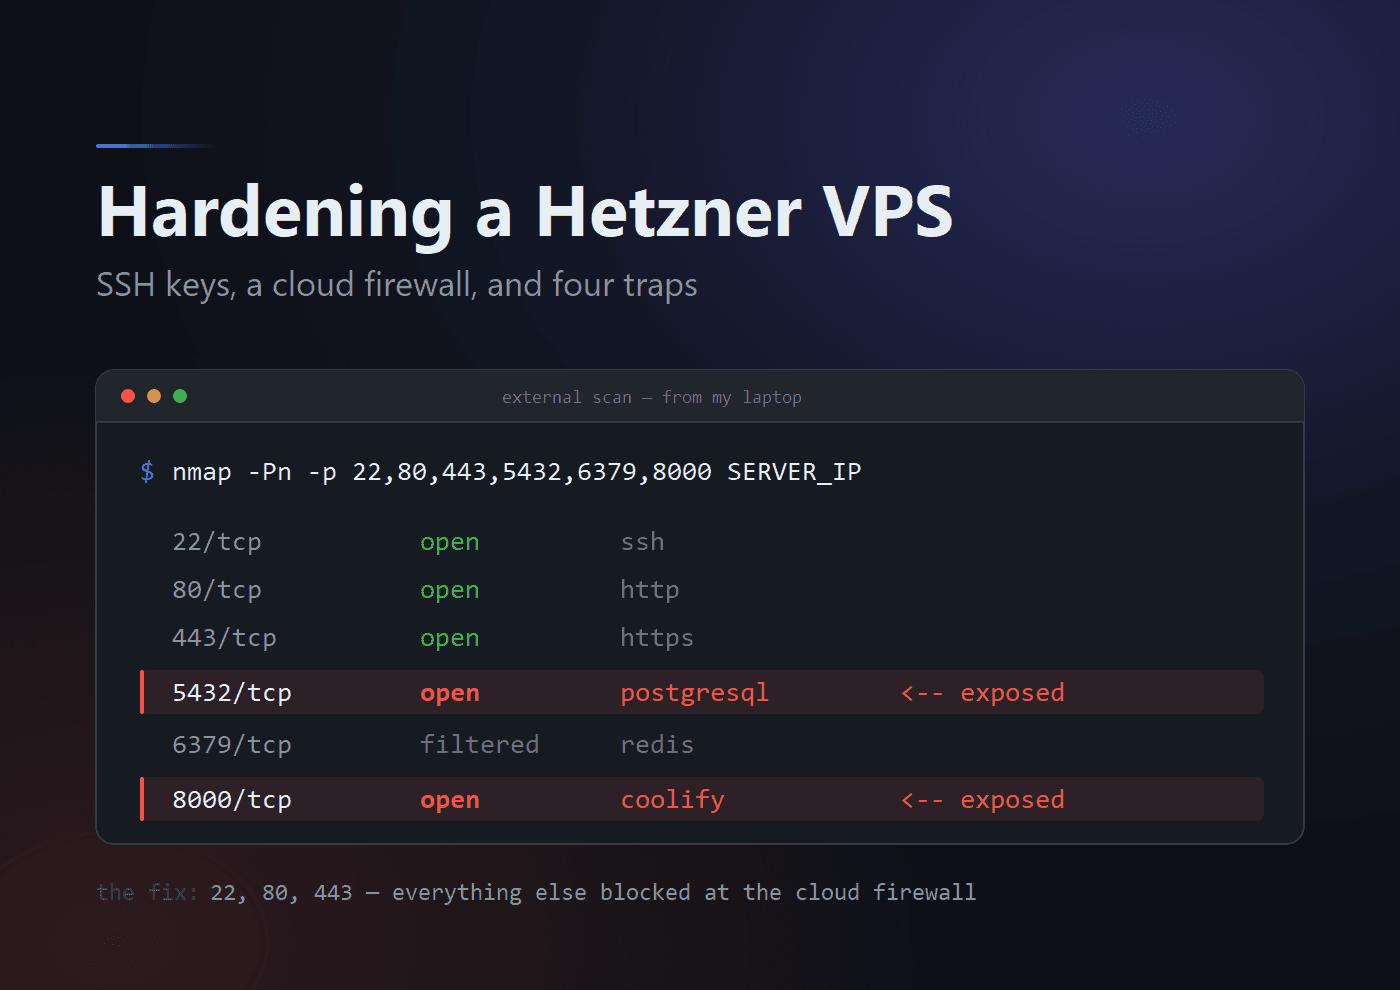
I scanned my own server from my laptop and did not like what came back.
22    OPEN
80    OPEN
443   OPEN
5432  OPEN
6379  closed/filtered
8000  OPEN
Port 5432 is PostgreSQL. Port 8000 is the Coolify dashboard, over plaintext HTTP. Both were answering the public internet, on a Hetzner Cloud VPS running real applications.
What should have been an afternoon's work — swap root password login for an SSH key, close the ports that have no business being open — turned into a long and genuinely instructive detour. I locked myself into a browser console with a broken keyboard, chased a rejected SSH key for hours before discovering it was a single wrong character in a filename, and learned that the host firewall I would reflexively have reached for does not do what I assumed it does.
This is what I did, what went wrong, and the order I would do it in next time.
The two things I wanted
The end state was not complicated:
Internet
   |
   +-- 22/tcp   SSH, public key only
   +-- 80/tcp   HTTP / ACME
   +-- 443/tcp  HTTPS
   |
   +-- everything else blocked
Two separate pieces of work. Replace password authentication with a key, and put a firewall in front of the machine. I started with the key, because the firewall would close port 8000 and I wanted a reliable way in before I did that.
That ordering was right. Almost everything else about my approach was wrong.
Part 1 — SSH keys
Why bother
A public-key login has two halves that never meet:
Laptop                          Server
  ~/.ssh/id_ed25519               /root/.ssh/authorized_keys
  private key, passphrase         public key
The private key never leaves the laptop. The server only ever holds the public half, and during authentication it verifies that the client can prove ownership of the matching private key. There is no shared secret travelling over the wire, and nothing on the server that is worth stealing.
Compare that with root password authentication exposed to the internet, where every bot that finds your IP gets unlimited attempts at a single string.
The configuration I wanted:
PubkeyAuthentication yes
PermitRootLogin prohibit-password
That second line means root may log in with a key but never with the account password. When I finally checked, my server already reported:
permitrootlogin without-password
pubkeyauthentication yes
without-password is simply the older spelling of prohibit-password. So the server had been configured correctly all along — which, as it turned out, was the source of considerable confusion.
Trap 1: adding a key in Hetzner does not touch an existing server
Hetzner Cloud has a perfectly good SSH key manager:
Project -> Security -> SSH Keys
I added my new key there, and assumed I was done.
I was not. Those keys are injected at server creation time. They are handed to cloud-init when a new VPS is built. Adding one to the project does nothing whatsoever to a machine that already exists.
For a running server, the public key has to physically arrive in /root/.ssh/authorized_keys. There is no shortcut, and the console gives you no hint that the key you just added is inert.
Trap 2: the web console keyboard
Because password login to root was refused — correctly, per prohibit-password — I fell back to the Hetzner web console:
Hetzner Cloud Console -> Project -> Servers -> select VPS -> Console
This is a genuinely valuable recovery path. It is direct console access that does not involve sshd at all, which means it keeps working when you have thoroughly broken your SSH configuration. Knowing it exists is the difference between a bad afternoon and a rebuilt server.
It is also, on a non-US keyboard, close to unusable for real work.
I tried to run:
sshd -T | grep permitrootlogin
and the pipe character did not arrive. Then this:
chown -R root:root /root/.ssh
was received by the shell as:
chown -R root;root /root/.ssh
because the colon came through as a semicolon — turning one command into two, the second of which does not exist:
chown: missing operand after 'root'
Command 'root' not found
The workaround is to avoid punctuation entirely where you can:
chown -R root /root/.ssh
chgrp -R root /root/.ssh
I want to be clear about how much this cost. It was not a minor irritation. Every diagnostic command I wanted to run contained a pipe, a colon, or an underscore, and I could not reliably type any of them. Several hours of the confusion that follows are directly attributable to working in that console rather than getting out of it.
Trap 3: authorized_keys versus authorized-keys
This was the expensive one.
OpenSSH reads exactly the files named in its configuration, which on my server was:
.ssh/authorized_keys
.ssh/authorized_keys2
Note the underscore:
authorized_keys
          ^
During troubleshooting, a second file came into existence:
authorized-keys
          ^
with a hyphen. OpenSSH does not read that file. It does not warn about it. It does not care that it exists.
In a small browser console, at console font size, those two names are near enough identical that I checked the wrong one repeatedly. Which produced a genuinely maddening situation:
- the public key fingerprint was correct;
- the file permissions were correct;
- the client was demonstrably offering the right key;
- and sshd rejected it every time.
Every individual check passed. The checks were being run against a file that sshd never opens.
The command that would have saved me is:
grep -Rni AuthorizedKeysFile /etc/ssh
When debugging key authentication, verify the file path sshd actually reads before you verify anything inside it. Everything else is downstream of that.
Trap 4: you are probably not the only key
Reading the SSH logs turned up something I had not considered:
journalctl -u ssh -n 30 --no-pager
Accepted publickey for root from 10.x.x.x ...
Two useful facts at once. Public-key authentication for root was working perfectly well in general — so the problem was specific to my key, not to the configuration. And a different key was already being used from a private address, almost certainly by Coolify or another automation process on the box.
Had I done the obvious thing and written my key over authorized_keys with >, I would have silently broken that automation and spent the next week wondering why deployments had stopped.
On a managed server, always append. Back the file up first.
Fingerprints settle arguments
The fastest way to prove a key is or is not the key you think it is.
On Windows:
ssh-keygen -lf "$env:USERPROFILE\.ssh\id_ed25519.pub"
On the server:
ssh-keygen -lf /root/.ssh/authorized_keys
The fingerprints must match exactly. The output looks like this:
256 SHA256:xxxxxxxxxxxxxxxxxxxxxxxxxxxxxxxxxxxxxxxxxxx user@example.com (ED25519)
This is what finally let me prove that the right key had reached the right file, rather than assuming it from the fact that I had pasted it.
Reading the client side
ssh -vvv -i "$env:USERPROFILE\.ssh\id_ed25519" root@SERVER_IP
Two lines matter:
Offering public key: ...
Authentications that can continue: publickey,password
Together they told me the connection was fine, the client could read the private key, the correct key was being offered, and the server was refusing it.
That is the moment to stop generating new keys. Regenerating a key that is being offered correctly and rejected server-side cannot possibly help, and I wasted a round doing it anyway.
One thing worth knowing, because it misled me: that publickey,password list does not mean root may log in with a password. It reports which methods sshd has enabled globally. Under PermitRootLogin prohibit-password the server still advertises password, still prompts for it, and still rejects every attempt for root. The prompt appearing is not evidence that answering it can ever work.
The technique that unstuck all of it
The single most useful thing I did was start a second sshd on a different port, leaving the production daemon on 22 completely untouched.
In debug mode, it tells you everything:
/usr/sbin/sshd -ddd -p 2222 -E /tmp/sshd-debug.log
Then from the laptop:
ssh -p 2222 -o PasswordAuthentication=no -o IdentitiesOnly=yes -i "$env:USERPROFILE\.ssh\id_ed25519" root@SERVER_IP
and read what the server thought it was doing:
grep -i authorized /tmp/sshd-debug.log
grep -i publickey /tmp/sshd-debug.log
grep -i allowed /tmp/sshd-debug.log
This shows the exact file being opened and whether the offered key matched. It is the answer to the authorized_keys / authorized-keys problem, and I had it available from the first minute.
The second variant is what finally got me out of the browser console. A temporary daemon that explicitly permits root password login, on a port nothing else uses:
/usr/sbin/sshd -D -p 2222 \
  -o PermitRootLogin=yes \
  -o PasswordAuthentication=yes \
  -o PubkeyAuthentication=no \
  -E /tmp/sshd-temp.log
From PowerShell:
ssh -p 2222 `
  -o PubkeyAuthentication=no `
  -o PreferredAuthentications=password `
  root@SERVER_IP
And there it was:
root@my-ubuntu-server:~#
A real terminal. Pipes, redirection, underscores, copy and paste — all working. The production SSH service on port 22 was never modified, so there was nothing to undo and no risk of locking myself out further.
This is the part I would reach for far earlier next time. It gives you a working shell without touching the thing you are trying to fix, which is exactly what you want when the thing you are trying to fix is your only way in.
Then stop typing the key
With a normal shell available, there was no reason to keep hand-copying an 80-character base64 string through a console with a broken keyboard.
scp -P 2222 "$env:USERPROFILE\.ssh\id_ed25519.pub" root@SERVER_IP:/root/windows_id_ed25519.pub
Verify what arrived:
ssh-keygen -lf /root/windows_id_ed25519.pub
Back up what is already there — remember trap 4:
cp -a /root/.ssh/authorized_keys /root/.ssh/authorized_keys.before-fix
Append, do not overwrite:
cat /root/windows_id_ed25519.pub >> /root/.ssh/authorized_keys
Fix permissions, because OpenSSH is deliberately strict and will refuse a key file that is too readable:
chmod 700 /root/.ssh
chmod 600 /root/.ssh/authorized_keys
chown root:root /root/.ssh/authorized_keys
A healthy result looks like:
drwx------ root root /root/.ssh
-rw------- root root /root/.ssh/authorized_keys
Then confirm the effective server configuration — which is a different question from what is written in the config file, since sshd -T resolves includes, defaults and overrides:
sshd -T | grep -E 'permitrootlogin|pubkeyauthentication|authorizedkeysfile|strictmodes'
permitrootlogin without-password
pubkeyauthentication yes
strictmodes yes
authorizedkeysfile .ssh/authorized_keys .ssh/authorized_keys2
Everything needed for ED25519 root key authentication, enabled.
The moment it worked
ssh -o PasswordAuthentication=no -o IdentitiesOnly=yes -i "$env:USERPROFILE\.ssh\id_ed25519" root@SERVER_IP
Enter passphrase for key ...
Welcome to Ubuntu ...
root@my-ubuntu-server:~#
That prompt is worth reading carefully, because the distinction is the whole point of the exercise:
root password != SSH private-key passphrase
The server was no longer asking for anything the server knows. It was asking for the passphrase protecting a file on my laptop — a secret that has never been transmitted anywhere and cannot be guessed remotely at any rate, because there is nothing remote to guess against.
Making it pleasant
A config file, at C:\Users\<username>\.ssh\config:
Host hetzner
    HostName SERVER_IP
    User root
    IdentityFile ~/.ssh/id_ed25519
    IdentitiesOnly yes
Now it is just:
ssh hetzner
I kept the passphrase on the key. Removing it would make logins easier and would also mean that anyone who obtained the file could use it immediately — which is precisely the scenario a passphrase exists for. The right answer is an agent, not a naked key.
In an Administrator PowerShell:
Get-Service ssh-agent | Set-Service -StartupType Automatic
Start-Service ssh-agent
Then in an ordinary one:
ssh-add "$env:USERPROFILE\.ssh\id_ed25519"
ssh-add -l
Type the passphrase once. The key stays encrypted on disk; the agent holds the decrypted copy in memory for the session.
Part 2 — the firewall
With a reliable way in, back to the ports that started this.
UFW is not the answer, and the reason matters
My first instinct was ufw deny 5432 on the host. That instinct is wrong, and it is wrong in a way that is worse than doing nothing, because it produces a rule that looks correct and does nothing.
A host firewall does not control Docker's published ports. When Docker publishes a container port it installs DNAT rules in the nat table's PREROUTING chain and accepts the result in FORWARD. UFW writes its rules into INPUT. Traffic to a published container port is translated and forwarded before INPUT is ever consulted, so it sails straight past every UFW rule you wrote.
You can add ufw deny 5432, see it listed in ufw status, scan from outside, and find the port still open. Nothing is broken; the rule simply does not apply to that traffic.
There are two controls that do work. iptables -I DOCKER-USER ... is correct, and is one flushed chain or one package upgrade away from vanishing. A provider-level firewall is the other, and it is the one to build on:
Internet
   |
Hetzner Cloud Firewall     <- runs on Hetzner's network
   |
VPS                        <- nothing here can reach around it
   |
Docker
   |
Applications
Traffic rejected by the Hetzner firewall never arrives at the machine at all. Docker's iptables rules are irrelevant, because there is no packet for them to act on.
The rules
Project -> Firewalls -> Create Firewall
Inbound, and nothing else:
| Protocol | Port | Purpose |
|---|---|---|
| TCP | 22 | SSH |
| TCP | 80 | HTTP / ACME |
| TCP | 443 | HTTPS |
Deliberately absent: 5432, 6379, 6001, 6002, 8000.
One detail that is easy to miss — enter both 0.0.0.0/0 and ::/0 as sources on every rule. Your server has an IPv6 address. If whatever published that database port bound it to :: as well, an IPv4-only ruleset leaves the hole wide open on an address most scanners never told you about.
Attach the firewall to the server. It takes effect immediately.
Closing 8000 does not lock you out
Worth stating, because it is the reason people leave it open. Port 22 stays open, so the Coolify dashboard is still one tunnel away:
ssh -L 8000:127.0.0.1:8000 hetzner
then http://localhost:8000 in the browser. Use that while you set a proper hostname for the dashboard so it lives behind HTTPS on 443, where it belongs:
Internet -> 443 -> reverse proxy -> Coolify
rather than a management interface accepting credentials over plaintext HTTP on a numbered port.
Verify from outside, or you have not finished
A firewall you have not tested from another network is a hypothesis.
nmap -Pn -p 22,80,443,5432,6379,6001,6002,8000 SERVER_IP
What you want:
22/tcp    open
80/tcp    open
443/tcp   open

5432/tcp  filtered
6379/tcp  filtered
6001/tcp  filtered
6002/tcp  filtered
8000/tcp  filtered
filtered is the good outcome — it means packets are being dropped silently rather than refused, so a scanner learns nothing about what is behind them.
Run this from your laptop, never from the server. A scan run on the box hits its own loopback interface and reports everything as open, which tells you precisely nothing.
Then check the things that are supposed to still work: ssh hetzner, the dashboard over HTTPS, and every deployed application.
A firewall is not a fix, it is a second layer
Blocking 5432 at the perimeter solved the exposure. It did not answer why the port was listening on a public interface in the first place, and that question still deserves an answer.
ss -lntp
docker ps --format "table {{.Names}}\t{{.Ports}}"
If a container reports:
0.0.0.0:5432->5432/tcp
then Docker has published the database on every interface the host has. That is the actual defect. Applications sharing a Docker network reach PostgreSQL by service name over the private network and need no host port mapping at all — so the mapping should be removed, not merely firewalled.
If you genuinely need a database client on your laptop, bind to loopback explicitly and tunnel:
ports:
  - "127.0.0.1:5432:5432"   # the interface prefix is the entire point
ssh -L 5432:127.0.0.1:5432 hetzner
Docker honours that prefix, so it is unreachable from outside. Note how close it is to the version that caused all this: "5432:5432" and "127.0.0.1:5432:5432" differ by ten characters and by everything.
With the mapping gone, the Hetzner firewall becomes a second line of defence rather than the only one.
Where it ended up
                    Internet
                       |
                       v
              Hetzner Cloud Firewall
                       |
             +---------+---------+
             |         |         |
            22        80        443
             |         |         |
             v         v         v
           SSH       HTTP      HTTPS
             |                   |
   public-key auth            Coolify / apps
             |
             v
    /root/.ssh/authorized_keys


PostgreSQL / Redis / internal services
             |
             v
        Docker networks
             |
      not internet-facing
- root SSH access via an ED25519 key, passphrase-protected
ssh-agenton Windows so the passphrase is typed once per sessionssh hetzneras the whole command- inbound 22, 80 and 443, and nothing else
5432and8000off the public internet- the Hetzner web console retained as the emergency path
The order I would use next time
The technical lessons were useful. The procedural one matters more, because following it would have made most of the technical ones unnecessary.
- Open the Hetzner web console and keep it open. It is the recovery path.
- Look at the existing
/root/.ssh/authorized_keysbefore touching anything. - Back it up.
- Start a temporary
sshd -dddon port 2222 — before you need it, not after. - Get a real terminal. Do not troubleshoot through a browser console with a keyboard you cannot type on.
- Transfer the
.pubfile withscp. Never paste a key by hand. - Compare fingerprints on both ends.
- Confirm which file sshd reads:
grep -Rni AuthorizedKeysFile /etc/ssh. - Check effective config with
sshd -T, not the config file. - Append the key. Never overwrite automation keys.
- Test with
ssh -vvvfrom a second window, keeping the first alive. - Configure
ssh-agentand an alias. - Create the provider firewall, IPv4 and IPv6.
- Scan externally.
- Remove the unnecessary Docker host-port mappings.
Commands worth keeping
Client
ssh hetzner
ssh -vvv hetzner
ssh-keygen -lf "$env:USERPROFILE\.ssh\id_ed25519.pub"
ssh-add "$env:USERPROFILE\.ssh\id_ed25519"
ssh-add -l
Server
ssh-keygen -lf /root/.ssh/authorized_keys
grep -Rni AuthorizedKeysFile /etc/ssh
sshd -T | grep -E 'permitrootlogin|pubkeyauthentication|authorizedkeysfile|strictmodes'
journalctl -u ssh -n 50 --no-pager
sshd -t                    # validate before reloading
systemctl reload ssh
Exposure
ss -lntp
docker ps --format "table {{.Names}}\t{{.Ports}}"
nmap -Pn -p 22,80,443,5432,6379,6001,6002,8000 SERVER_IP
What I actually took away
Not the individual commands. The layering:
SSH key security
  + OpenSSH configuration
  + filesystem permissions
  + provider firewall
  + Docker network isolation
  + external verification
No single layer should carry the whole load. The web console is a fine recovery channel and a poor terminal. The Hetzner firewall is a strong perimeter and not a reason to leave a database published on 0.0.0.0. SSH keys beat passwords and still deserve a passphrase and an agent.
And the habit that turns a dangerous change into a routine one:
Keep one known-good administrative path open until the replacement has been tested successfully.
Every genuinely bad moment in this exercise came from a version of me who had not done that.